DEF CON CTF Quals 2022: the BIOS Challenge

This year, we participated in the DEF CON CTF Quals. This is a short write up of the BIOS challenge. You can find the solution for this year’s Hashit challenge and a write up of last year’s DEF CON CTF Quals here.
The BIOS Challenge
One of the reverse engineering challenges in the DEF CON 30 CTF (Capture The Flag) Qualifiers was called BIOS.
The task was to extract a flag from the 768KiB binary.
Initial Analysis
A quick look around the strings in the file reveals that this image is based on version 1.16.0 of SeaBIOS, the open source BIOS.
SeaBIOS (version %s)
rel-1.16.0-0-gd239552-dirty-20220504_221250-Lightning-Laptop
Running the Code
QEMU, the open source machine emulator can load custom BIOS images, so let’s give that a try:
qemu-system-i386 --bios bios-nautilus.bin
…and we have liftoff:

The BIOS code itself displays the bios of the CTF organizers (pun most definitely intended).
There is a simple menu where a cursor moved by the Up/Down keys selects a person and SPACE or Enter shows their info consisting of a picture and text. SPACE or Enter turns to the next page of the text and jumps back to the main menu from the last page.
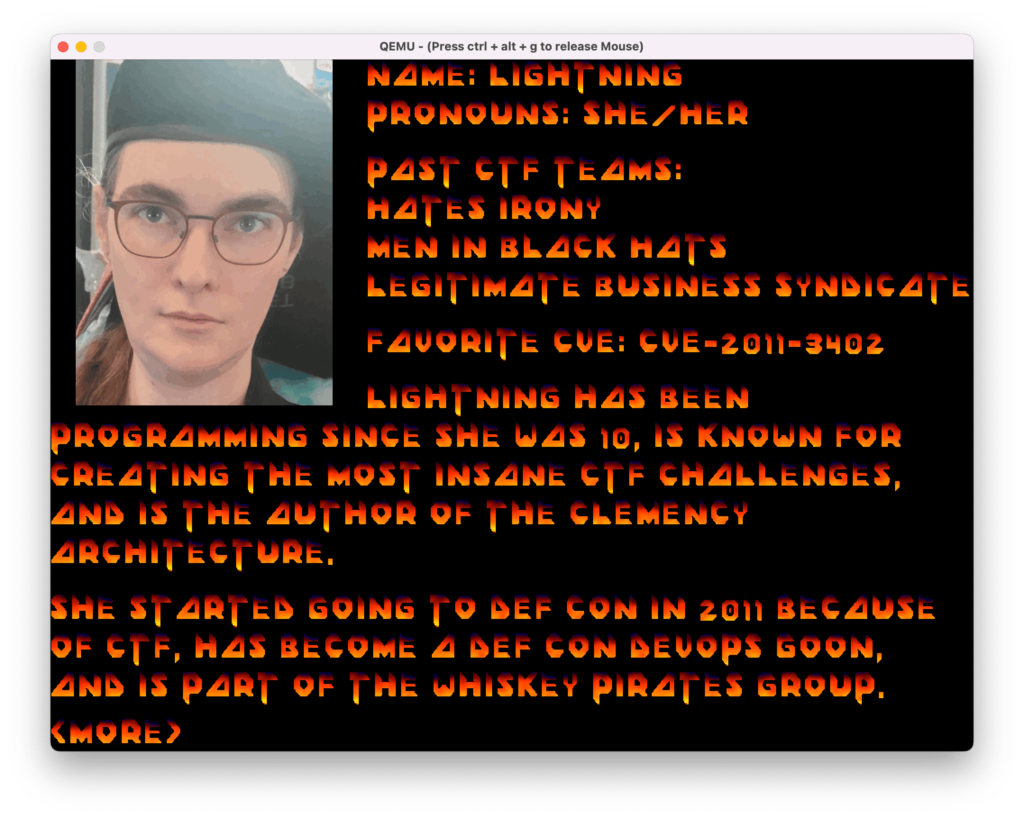
(Thanks Lightning! This was fun!)
Deeper Analysis
The binary contains a number of files in a Coreboot Flash container, identified by the magic LARCHIVE. The filenames provide clear indication what each of them are for. There are a number of supporting files, such as:
font.dat
fire.pal
font.bmp.lzma
names.txt lists the names of the CTF organizing team and for each there is a .txt and a .bmp file with their bios.
For example:
ENDEAVOR.txt
ENDEAVOR.bmp.lzma
Files with a .lzma suffix are LZMA compressed, and one file stands out from the rest: flag.lzma.enc
This in very promising!
The name suggests it is an LZMA-compressed block which was encrypted some way. Let’s find out where and how.
Time to fire up the disassembler!
Looking around, we find that the code was most likely compiled with inlining enabled as the function boundaries are not very clear. Still, with the source code for SeaBIOS we can identify a fair chunk of the code with relative ease. String references in functions often give strong clues about their function and make it easy to match them to the source code.
Binary strings are rich sources of information for reverse engineering. They don’t disappoint this time either. We quickly spot references to NAUTILUS INSTITUTE BIOS OF BIO'S which is the part where the main menu is built for example. Spending a bit of time with this part of the code allows us to identify some common functions, for example, the text display and keyboard input.
A more interesting string is nautilus, which is referenced only once in the whole code! As it turns out it is used for comparison with a sequence of keystrokes. A-ha!
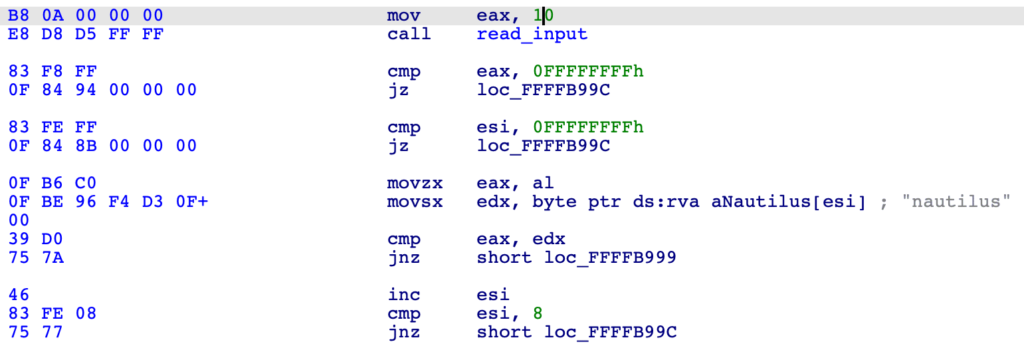
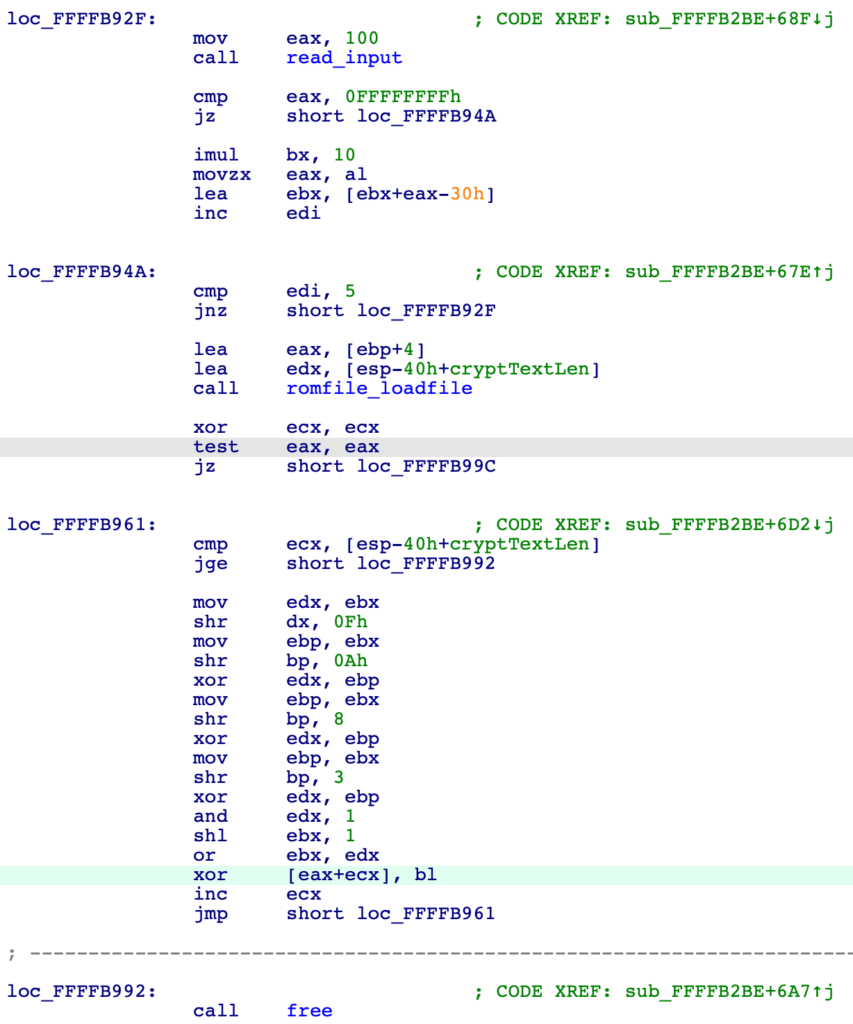
If the word nautilus is entered at the right time, another input loop follows and expects a five-digit number. All input is timed, however, and the loop simply exits if the keys are not pressed fast enough. If the password and the five-digit number are entered in a timely manner, a romfile is loaded and its content is decrypted using the number entered as the key. There are no checks and the decrypted data is not used for anything. Clearly, this bit of code is here to show how the decryption is performed.
The binary analysis is done now.
Decrypting the Flag
The five-digit number means that there are only 100,000 possible seeds which makes this problem easy to brute-force.
We also know that the flag is LZMA-compressed so we can look for typical LZMA header values to check our key.
Ciphertext:    8E A6 4C 19 33 A9 C4 (first 5 bytes of flag.lzma.enc)
Plaintext:     5D 00 00 80 00 36 00 (first 5 bytes of all other .lzma file in the binary)
Excpected key: D3 A6 4C 99 33 9F C4 (the byte pairs XORed together)
The seed finder completes very quickly and yields a number of hits:
...
Found seed value: 26857
Found seed value: 31337
Found seed value: 35817
...
31337, we should have seen that coming… 😉
We could adapt the tool to perform the actual decryption, but the original binary already does this and allows us to take a quick detour into debugging with QEMU and GDB.
QEMU’s GDB interface can be activated with GDB with a simple command-line switch:
qemu-system-i386 --bios bios-nautilus.bin -s -S
After this QEMU is running, the program is stopped, waiting for GDB to connect.
At the GDB prompt we connect and start the program:
target remote localhost:1234
continue
Now we only need a breakpoint right after the decryption and a way to enter the password and seed fast enough.
Placing the breakpoint is a bit tricky because the BIOS code is relocated at runtime, so the offset seen in the disassembly does not always match what is in the memory. One way to find out the translation is to look for a sequence of opcode bytes in the memory.
We are looking for the free() call right after decryption, located at 0xFFFFB992 in our disassembly.
➤  find /b 0x0000, 0x7fffff, 0xE8, 0x2a, 0xa7, 0xff, 0xff
0x7bf412
> break *0x7bf412
In order to place breakpoints near the real addresses, we need to calculate them by adjusting for the difference. Fortunately, GDB can do arithmetic, so this is easy to do. For example, now that we know to place a breakpoint at the location seen as 0xFFFFB952 in our disassembly, we simply say:
> break *(0xFFFFB952 - 0xff83c580)
Breakpoint 1 at 0x7bf3d2
With the breakpoint in place, we now need to enter the password and the seed to get the decrypted block. There is a simple trick to make that happen. While QEMU is still in a stopped state (before we say continue in GDB), we can set the emulation speed to 1% in the Speed menu. This will slow execution down enough for us to be able to type in what is needed before the splash screen disappears.
Once the breakpoint hits, it is time to get our prize:
Id 1, stopped 0x7bf412 in ?? (), reason: BREAKPOINT
> dump memory flag.lzma $eax $eax+908
Making Sense of the Flag
Now, with the decrypted block in place, we can try and decompress it:
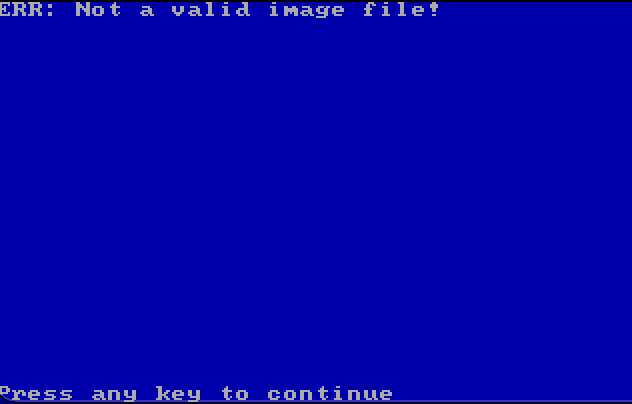
% lzma -d <flag.lzma >flag.bin
lzma: (stdin): Compressed data is corrupt
Uh-oh, looks bad! But, it turns out that the resulting file is usable nevertheless.
Let’s see what we got:
APERTURE IMAGE FORMAT (c) 1985
A quick search later we learn about the APF image format developed by Doug Rattmann at Aperture Laboratories in 1985.
We are faced with two options: a) implement our own APF converter or b) use an existing one. To save time, we opt for one written in QBASIC, running in DOS.
Oh, no, not again. Maybe we should call Doug Rattmann on EXT. 3270. 😉
Well, it turns out that the original Aperture Science viewer from 1985 is really picky about line endings. After a quick fix we can enjoy the fruit of our labour:

…well, almost. It turned out that the correct flag is, in fact, Descent ][ Rules, which this particular font does not make easy to see.
Closing
Since then, we learned that the LZMA decompression error message can be fixed by setting the archive file size (at offset 5) to 0xffffffffffffffff.
The encryption scheme is, apparently, Linear-feedback shift register.
This was a triumph,
We’re making a note here;
Huge success!
For more, follow CUJO AI Labs on Twitter!